Raku is a type of pottery produced by a traditional Japanese firing process. Actually, the Raku family has strong feelings about the name, and feels that for fifteen generations they have been the only people producing real Raku ware; but in most of the world, the term is generic.
To make most pottery, you form a shape out of wet clay, let it dry, fire it in a kiln to make the piece permanent, let it cool gradually, cover it (or the front side of it) with a liquid glaze, let that dry, fire it again to melt the glaze and bond it with the clay body, and let it cool gradually. The raku
process differs at the end of the glaze firing. Instead of letting the glazed piece cool gradually, you put it in a container of combustible material, close the container, let the fire in that container burn itself out, and cool the piece relatively quickly. A special clay is required to resist the rapid temperature changes of this process, and the results are highly variable — which made the traditional raku ware prized by masters of the Japanese tea ceremony. In fact, the story is that the person who developed the tea ceremony went to the leading ceramic artist of the time, asked for something with a special handmade look, and got the first raku piece (the artist was given that family name as an honor later.)
We didn’t make teacups at the Wildacres raku workshop. In order to get the work done in the few days we had, instructor Gary Lee limited our work to plaques. His assistant, Yolanda, rolled balls of clay out into quarter-inch-thick slabs with a slab roller, three slabs for each workshop participant. We arranged our natural material on the slabs, put them through the slab roller again to press the material firmly into the clay and leave a smooth top surface, and picked the material carefully out of the clay. We painted the edges of the slabs with a wax resist so they would dry without much warping and left the nature-printed slabs to dry. Gary did a sample raku firing in the afternoon, but we’ll save the description for later. That was all for Tuesday, but just the beginning of the fun.
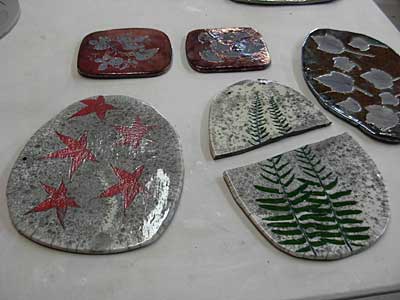
Gary and Yolanda dried the pieces in a cabinet heated with light bulbs and fired them. By Thursday we had our bisque ware, the once-fired ceramic somewhat similar to a clay flowerpot (except that we were working with a white clay.) It was time to decide on how we wanted to finish the pieces. The choices were either to paint the piece with a colored underglaze, coat it with a clear glaze, and end up with a crackle finish, or to use a glaze that would get a metallic luster that can only be produced in the chemistry of the smoky raku process.
Underglaze is a material that you use a lot like water color paint. It thins and washes off with water. Different colors of underglaze can be mixed to produced subtle shading, although the color that shows through a glaze may be a little different from the color of the liquid underglaze. To get a crackle finish, we were going to spray the red-hot piece with water to cool the molten glaze quickly and make it crack; some of the smoke in the raku firing vessel would fill the cracks, making them much more visible than a normal crackled glaze. Painting underglaze in the space left by every frond of the fern I had printed was by far the slowest part of the entire process.
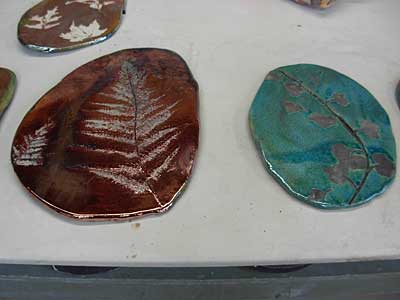
The luster glazes rely on a chemical process called reduction, which is the removal of oxygen from a chemical compound. It happens during the smelting of metal. In our raku firing, the soot produced by burning newspaper has a stronger affinity for the oxygen in copper oxide in the glaze than the copper does, which makes the glaze red or copper-colored rather than green. These two pieces were glazed with the same glaze, but the one on the right wasn’t hot enough when it went into the smoke-firing vessel, and didn’t get reduced:
The glazes were applied by pouring them on the piece. To prevent the luster glaze from filling the nature-printed areas, we could paint those areas with wax resist. The wax resist would burn out in the kiln; in fact, if we had missed any of the natural material we had pressed into the clay in the first place, it would have burned out in the bisque firing.
We started the raku firings on Friday evening and did most of them on Saturday. There was a special kiln for the process, with a cage of insulation that could be lifted by a counterweighted pulley arrangement so the fired pieces could be removed easily.
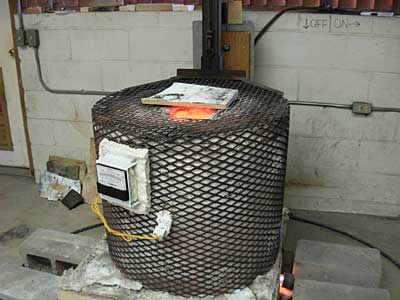
Three pieces could fit in at a time. We filled metal trash barrels with newspaper torn into strips. When the kiln reached a temperature of about 1800 degrees F (a self-cleaning oven doesn’t get above about 8 or 900 degrees)…
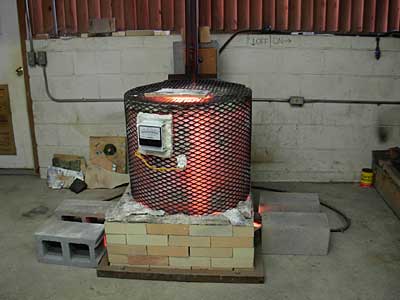
it was time to open it.
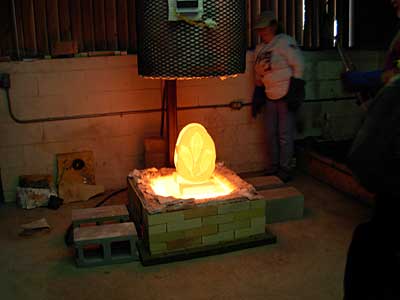
The pieces with the luster glazes had to be handled first. Someone wearing heavy gloves (that was me, for my pieces!) reached long tongs into the kiln, picked up the glowing piece, and put it into a trash barrel. The newspaper burst into flames!
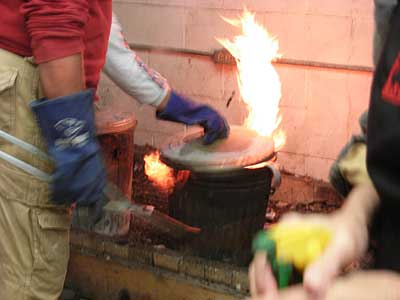
The lid went on the barrel, and we moved on to the next piece. There wasn’t so much rush for the pieces with clear glaze. The person who picked them out of the kiln could hold them until they stopped glowing, and someone else sprayed them with water.
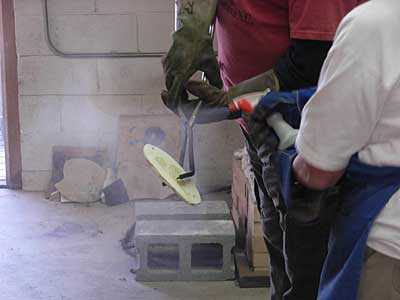
Though not glowing, the pieces were still hot enough to make the sprayer’s hands uncomfortably hot — and plenty hot to ignite the newspaper when they went in their trash barrels.
After fifteen or twenty minutes we could take the pieces out of the barrels, let them cool in the air, and then wash off the soot. And there we were, raku! (Did I mention that this process is very rough on the pieces? Several pieces, including the one of mine, below, with the fern that had taken so long to underglaze, broke during the firing or cooling.)
