It was really a pretty busy Saturday.
And by the way, there are lots of pictures, but no pretty pictures, in this post. Unless you’re interested in sash cords, it may not be worth waiting for.
More or less first (but after making french toast for breakfast) I went to the post office and bank. There was a teller I hadn’t seen before, an asian woman without a name plate by her window. I said, “there’s no name plate.” She said she was new, a name plate was on the way, and her name was Ming. I said, “I knew someone named Ming in high school.” Then I remembered, “means ‘bright'”. “Right”, she said, “how do you know?” um, I said, “Wo shuo yi diar zhong wen.” She said something in Chinese that I didn’t get at all but it could have been something like “where did you learn?” so anyway I explained (in English! I had reached the limit of my Chinese with one sentence!) that we had had a class where I used to work. That might be the most Chinese I’ve used in years.
Now to the main topic, fixing a window. We’ve had a window in the living room that we haven’t been able to open for months because if you unlocked it the top sash would just fall down and not stay up. There’s a very simple explanation: the sash cords were broken.
Here I digress a moment. It’s all about having some basic skills. That’s really how I feel about knitting, not so much that it’s a hobby for me (though it is) as that it’s something it’s useful to know. Look: when you’re hungry and you have a good apple crop, it’s useful to know how to bake apple pies. When you need a warm cap or mittens or sweater (or you can foresee the need) it’s good to know how to knit. When your window doesn’t work right, it’s good to know how to fix a sash cord.
When I was in college, the intellectual kids used to talk about alienation. I was never sure what they meant, but I thought it was that they weren’t really in touch with things, a lack of connection. So sure, you can buy apple pie, you can buy a cap and mittens and sweaters, and you can hire someone to fix the sash cord. But if you pick the apples and make the pie you’re not alienated from your food the way you are if you think apple pies grow in the supermarket. If you watch someone shearing a sheep, and do enough drop spindling to know how fleece turns into yarn, and knit, you’re not alienated from your clothing.
OK, so here are some pictures of fixing sash cords.
If you live in a house more than thirty or fourty years old, you probably have double-hung windows, that is, two sash that slide up and down. You may not have looked to see, or not thought about it, but there has to be something holding the upper sash up, and something that keeps the lower sash up when you push the window open. Face it, gravity is always at work. So the answer is, there are counterweights, big ugly blobs of cast iron, one on each side of the sash, that together weigh about as much as the sash, connected to the sash with a rope that goes over a pulley. It all more or less balances. The weights are always pulling the window up, but not so much that it goes up by itself. When (not if, when) the rope breaks, the window stops going up. That’s what was happening in our living room.
It does take some tools. I had taken a crowbar up to Casco and left it there. I bought a new tool, a Stanley Wonder Bar, specifically to fill in for this little job, and I think it is wonderful. It has good nail pulling claws at each end, a sharp enough flat end to fit into the space to pry off the side of the window, and it bends in the right places to give good leverage for prying. Because the first step is to take the sides off the window, carefully, so you can take the sash out. The rope runs from the top of the sash down a channel (just big enough for the rope) along the side to where there’s a hole big enough to accomodate a knot at the end of the rope. Here I am prying off the trim on the left side of the window:
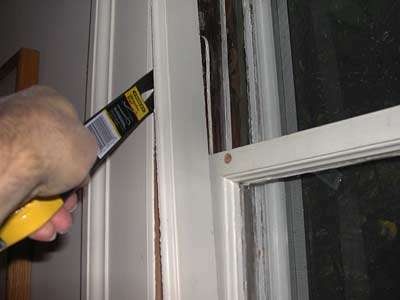
Of course you want to do that carefully so as not to damage the trim, but there are going to be nail holes to deal with. The trim on the other side and the top trim had to come off, too.
In between the two sash is a long thin piece of wood that just fits into the sides of the window frame. It’s not nailed in, because you have to be able to get it out for this job. The trim and the sash hold it in. It’s called the parting bead (that’s your vocabulary word for today). It’s in the dotted lines:
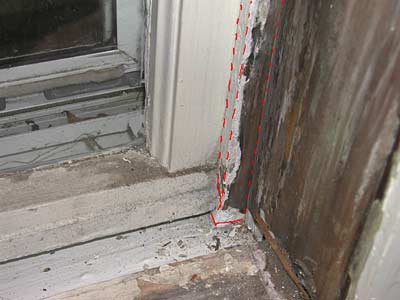
(Yuck! See what I mean, not pretty pictures?)
It comes in a couple of different sizes, but basically if you walk up to the desk at your local lumber yard and ask for a six foot length of parting bead they’ll know what you mean. They might ask if you want 3/8 or 7/16 inch thick stock, but you’ll be close. But measure the old stuff carefully so you’re prepared. With any luck you can get the old parting bead out without harming it, so that’s just an aside. You may be able to see from the picture that the top sash is keeping the parting bead from coming out. I had to take it out at the top and wiggle a little. Then I took it to the cellar and scraped and sanded off a few layers of gloppy paint.
With the trim and parting bead out of the way, the sashes are free. Basically all you have to do is thread the sash cord (ATTENTION! Use nylon sash cord. You can buy cotton sash cord, but it’s going to break sooner. It costs less, but it’s not worth it unless you’re in an apartment that you’re SURE you’re going to leave within five years) through the pulley. Tie a figure eight knot, that’s bulkier than an overhand knot and won’t pull out of the side of the sash, at the sash end of the cord. But wait, don’t do that you’ve figured out how long the rope has to be. I’ll talk more about that below.
There’s a cut out in the side of the window that’s hiding the space where the weights run. I’ve marked it with a dotted line in this picture. There’s going to be a screw at the top and bottom of the cut out to hold it in place. It could be, if the sash cord has never been replaced before, that the wood isn’t cut all the way through, and you’ll have to be a little forceful to break out the cutout.
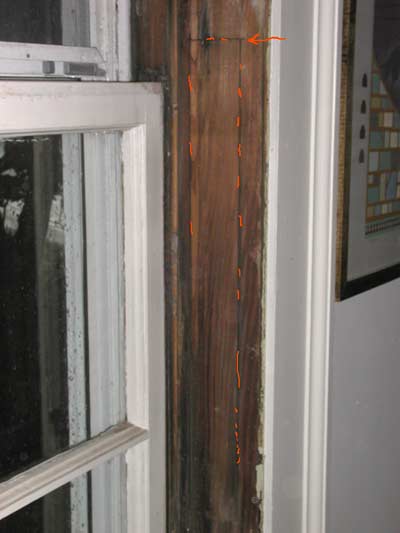
Reach into the space in the side, now that it’s open —
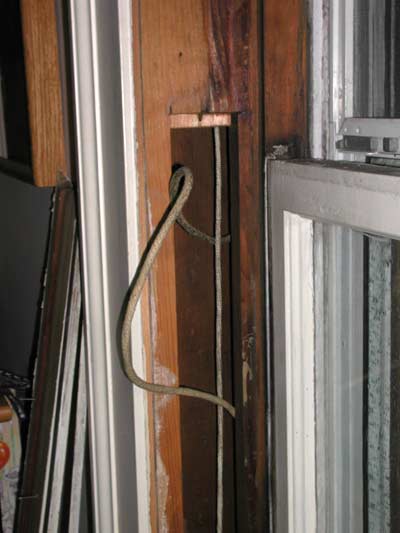
— how about that, there’s one sash cord, the one that’s not broken, holding up a weight, and the broken one still tied to its weight but flopping around. — and haul out the other weight. Be prepared to get your hands covered with dust and rust along about now. OK, study where the end of the rope goes on the sash and how high everything is, and cut a generous length of sash cord. Tie the figure eight knot in the end that’s going on the sash side and thread the rope over the pulley.
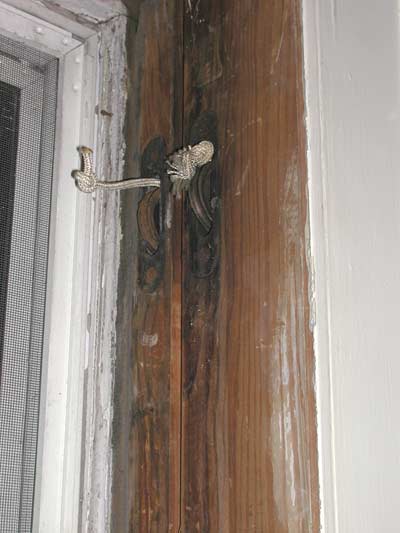
You have to get the rope the right length. There’s a fair bit of leeway, but it it’s too short the sash won’t go all the way down (the weight will come up to the pulley before the sash gets all the way down) and if it’s too long the weight will bottom out before the sash gets to the top, and the sash won’t stay all the way up. Cut plenty of cord, and be prepared to have to adjust the length after you hoped it was all set. Tie the weight to the end of the cord, put it back in the cavity, check that both weights run freely on their pulleys without being tangled with each other, do it all on both sides, put the knots in the ends of the ropes in place on the sides of the sash (be sure the sash is facing the right way! I put the window lock facing out on the first try, darn it), and put it all together. Put the parting bead back, nail the trim back on, and it’s done.
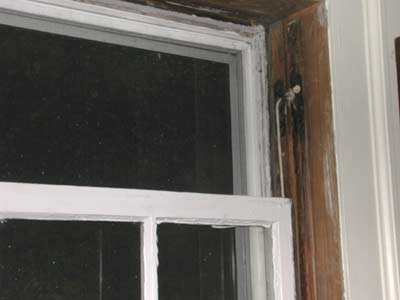
If there are still nails in the trim, you can get it back just exactly where it was. If not, put it on snugly but not too tight. If it’s too loose the windows will rattle when it’s windy. If it’s too tight, of course the windows will stick. Running a wax candle all over the channels the sash is sliding on, and along both sides of the parting bead, is a good idea.
The bottom line is, it’s not really hard, but there are a few subtleties about the process. It took me a couple of hours — maybe only an hour and a half, but not just a couple of minutes.
Well! With that out of the way, and it’s been on the to-do list for months, I went to Boston to Rayburn Music to look for a trumpet mouthpiece. I have a trumpet in Maine that Matt bought at a flea market and gave me. I fixed the water key (spit valve), which didn’t have a tight cover when he gave it to me, so the instrument didn’t really play at all, but I never liked the mouthpiece much. Old mouthpieces without a really smooth surface are a little uncomfortable, and I’ve never been able to get my full range on that trumpet. I think it’s likely that its mouthpiece is better for volume than high range. I figured if I got a mouthpiece more like the one on my good trumpet I’ll be able to practice in Maine. Rayburn has a basket of used mouthpieces that you can rummage through, if you don’t insist on a particular size, or if you want to come back until you find the size you want. I was pretty sure I’d be happy with something they had. I got two for $10 each.
I wished I could have spent more time in that store. Besides the mouthpieces, they had two instruments that I’d love to have, not enough to buy, but enough to drool over. One, a double-belled euphonium. I played one of them one summer in Tuskegee. They’re really an anachronism, a left-over relic of the nineteenth century. With one valve you can switch from a wide conical bore instrument like a baritone horn to a narrow cylindrical bore like a trombone, changing the timbre of the instrument. You hardly ever see them. At $2800, you’re not likely to see one in this house in the foreseeable future. The other instrument was an ophicleide. That’s substantially older and less common that the double-belled euphonium, I think. It’s a brass instrument pitched about like a baritone, but with keys like a saxophone. If the store had been less busy I would have asked if I could try it. I have to imagine its price was way above that of the euphonium; I didn’t even ask.
I had to move on and get home because we were going to Providence in the evening to give a stamping workshop at An Evening of Jewish Renaissance at the Providence Jewish Community Center. The Providence Bureau of Jewish Education has been big fans of Zum Gali Gali Rubber Stamps for years. They got the JCC to invite us to participate in this event. I ran the booth selling stamps while Arlene was giving the workshop. She only had two participants. It was a miserable windy rainy day (the weather was worse in the afternoon, pouring for a few minutes when I was walking from the parked car into Rayburn’s, not so bad really by the time we packed up to go to Providence, and windy but dry by the time we were coming home) and attendance at the whole event was lower than expected.
So, that’s what we can do in one day when we’re not in Maine!