Disclaimer: if you want to learn chair caning, this isn’t going to do it. Get a book like The Caner’s Handbook, or take a class. But at least I can tell you what’s involved.
This chair, with a broken seat, cost one buck at a yard sale. I got it just to learn caning on. Anne likes the old distressed look of the green finish and asked that I not refinish it. No problem! Of course I want to do a careful enough job to learn what’s involved, but I’m not going to be fussy.
0. You need to get the right size cane, depending on how big the holes in the chair are and how close together they are. Too wide a cane won’t fit through the holes, as you have to go through each hole several (six to eight or more) times. Too thin a cane won’t be strong enough to hold people up. With holes closer together, there are more lengths of thinner cane to share the weight.
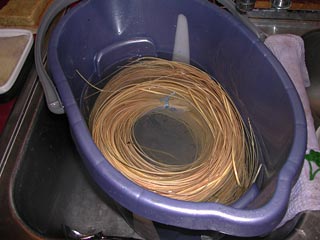
1.The cane comes in a coil. Soak the coil in warm water and hang it up so it can straighten. Pick out a few strands. This actually was a long part, because I had a pretty good tangle of cane to deal with after it had been hanging for a while and should have been straight.
2. Cut the old seat off the chair with a mat knife and clean the old cane out of the holes with an awl or ice pick.
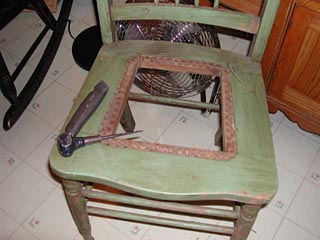
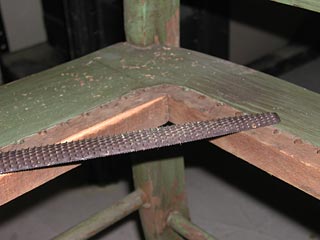
3. If necessary, round off the edge of the seat so the cane will be going over a curved edge rather than a sharp corner, just to reduce the chances that the cane will crack at that point. That tool is a wood rasp, sort of a file with very coarse teeth specifically made for shaping wood. It’s not as scary to handle as it may look. I used sandpaper after the rasp to get a good smooth rounded edge.
4. Find the center hole, or if there are an even number of holes, the hole to the right of the center, along the back rail, and mark it with a peg. Ditto on the front rail. Put one end of a soaked length of cane in the center back hole with about four inches sticking out the bottom and fasten it with a peg. The cane has a right side and a wrong side, and a head and tail end, which you need to pay attention to. After I did the first length, I realized that I had been working with a much longer piece of cane than I needed. That had slowed me down a lot. The cane is so inexpensive compared to paying someone to cane a chair that I’d recommend cutting each piece of cane to the length you’ll need — count the holes, measure the chair, allow maybe three inches per crossing for the up-and-down part and the underneath part, be a little generous so you don’t cut too short a length, but don’t use the full length as it comes.
I bought these pegs when I ordered the cane, but you could use golf tees or whittle pegs out of dowels.
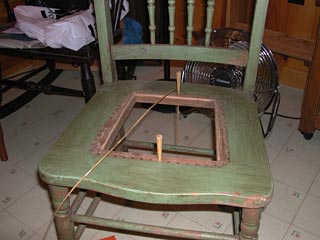
5. Lead the cane down to the center front hole, being careful to keep the right side up and the cane not twisted, pull tight, and fasten with a peg. Thread the cane up the next hole, being careful not to twist it, pull tight, and move the peg to hold the cane in this hole. Continue back and forth to the right-hand side of the back. This is slow, if you have a long strand of cane, but the only hard part is being sure the cane doesn’t get twisted.
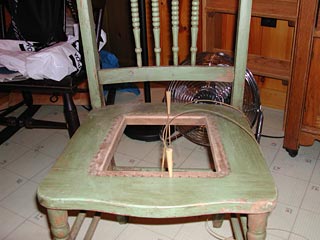
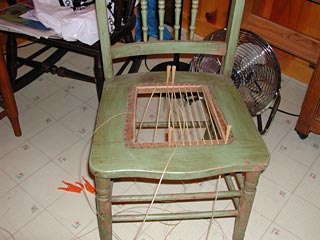
6. Similarly on the left-hand side of the seat.
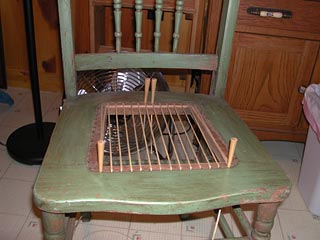
7. Starting at the rear hole on the left, go crosswise, keeping the cane above all the front-to-back strands. Doesn’t it look official? I haven’t gotten to any tricky parts yet.
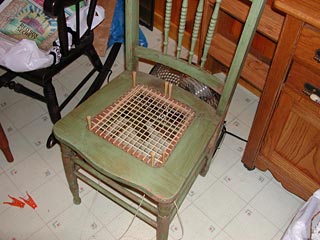
8. After you have gone fore-and-aft once and crosswise once, you go fore-and-aft again, starting with the center hole in the FRONT this time, and carefully putting the cane to the right of the first fore-and-aft strand, ABOVE the crosswise strands. You will start weaving with the next crosswise set of strands. If you’ve woven with yarn, you can see that this step makes the second half of the warp and that you already have half the weft in place where it belongs.
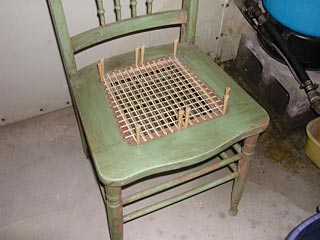
And that’s as far as I got last weekend.
Hey, there! You have a great start on that chair and I’m really glad to hear that you will not be refinishing it, I like the “shabby chic” look myself.
If you get stuck or want someone else to talk with about chair caning or other types of seat weaving, join us on the Seatweaving and Wicker Repair Discussion Board Forum at http://disc.server.com/Indices/220033.html
It’s made up of professionals as well as beginning chair seat weavers, all ready to discuss a variety of related topics and offer help and suggestions or just plain chatting.
Pop on over to my blog too sometime and take a look at all the interesting topics I write about, complete with pictures, too! http://wickerwoman.blogspot.com
Domain website has care and cleaning of cane seat furniture and other Tip Sheets of interest. http://www.WickerWoman.com/tip_sheets.html
Keep up the good work on the cane chair, I bet you’ll fall in love with the process and take it up as a profession or at least a part-time job or hobby!
The Wicker Woman/Cathryn Peters/Angora, MN
http://www.WickerWoman.com/